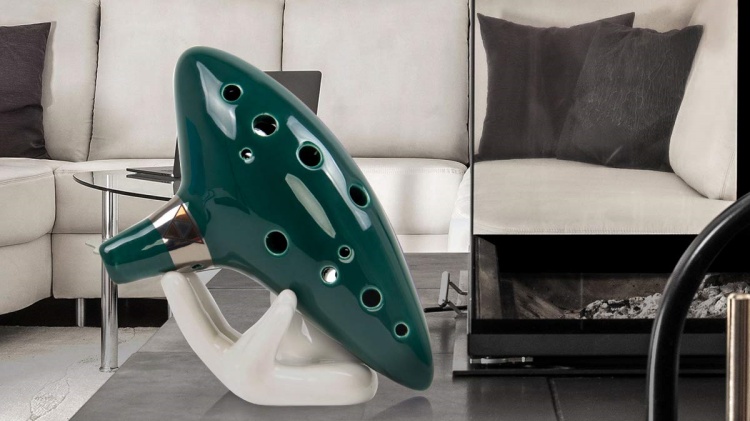
Exploring the Mystical Sounds: The World of the Ocarina
The ocarina is an ancient wind instrument known for its otherworldly and evocative sound. With a history spanning over 12,000 years across cultures worldwide, the

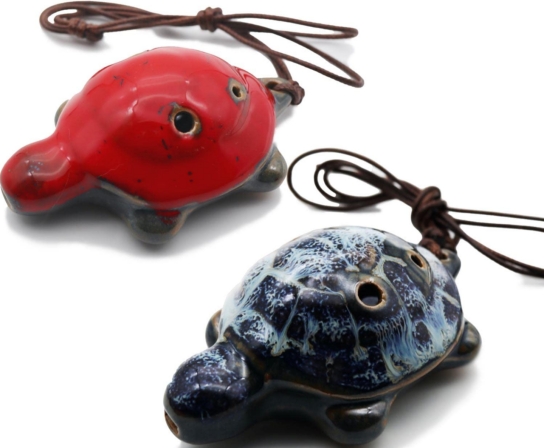
Ever dreamed of making your very own Pendant Ocarina? This mystical wind instrument, not only carries a rich history but also offers a delightful DIY crafting experience.
Whether you’re a seasoned musician or a curious crafter, this guide will walk you through the enchanting process of creating a Pendant Ocarina from scratch.
Before diving into the creation of your Pendant Ocarina, it’s crucial to have the right materials and tools at hand.
Gathering your materials is an adventure in itself. Explore local craft stores or online suppliers to find the perfect type of clay and the tools that feel right in your hands.
This stage of the process allows you to connect with the materials, fostering a deeper understanding of the craft.
The design phase is where your Pendant Ocarina starts to take shape – literally and figuratively.
Consider the size and ergonomics. A typical Pendant Ocarina is small enough to be worn as a pendant but large enough to produce a clear sound.
Sketch your ideas on paper, playing around with different shapes until you find one that resonates with your vision.
Plan the placement and size of the sound holes carefully. This will significantly impact the pitch and tonal quality of your Pendant Ocarina.
Use your knowledge of music and acoustics, or consult online resources to guide you in this technical aspect.
Think about the visual design. Whether it’s a simple elegance or a vibrant pattern, your Pendant Ocarina should reflect your personal style.
Let your imagination run wild – this is your chance to infuse your personality into the instrument.
Now, let’s get your hands dirty and start shaping your Pendant Ocarina.

Mold the clay into your desired shape. This is where your Pendant Ocarina starts to come alive.
Feel the clay in your hands and let your creative instincts guide the formation. The tactile experience of shaping clay is both grounding and exhilarating.
Precision is key here. Carve the sound holes delicately to ensure they align with your design and musical needs.
Remember, the size and position of these holes will determine the notes your Pendant Ocarina can play. This step might require patience and practice, but it’s crucial for the musicality of your instrument.
Allow your Pendant Ocarina to dry completely before firing it in a kiln. This step is crucial for the instrument’s durability and sound integrity.
The firing process hardens the clay and prepares it for the glazing phase. Patience is key during the drying process – rushing can lead to cracks or warping.
A touch of color and creativity can transform your Pendant Ocarina into a work of art.
This stage is not just about aesthetics; it’s about making your Pendant Ocarina an extension of your creative identity.
The final touches to your Pendant Ocarina are crucial for its functionality and aesthetics.
Attaching the String: This makes your Pendant Ocarina wearable. Choose a string that complements the color and style of your ocarina. It should be sturdy yet elegant, adding to the overall beauty of the instrument.
Tuning: Adjust the sound holes if necessary to fine-tune the pitch. This might require some trial and error, but it’s a vital step in ensuring your ocarina sounds as beautiful as it looks. Tuning is a delicate process that blends art with science, requiring a good ear and a gentle touch.
Taking care of your Pendant Ocarina ensures its longevity and sound quality.
Cleaning: Keep it dust-free and handle it with care. A soft cloth is usually sufficient for regular cleaning. Be gentle to avoid damaging the glaze or altering the tuning.
Storage: Store your Pendant Ocarina in a safe place to avoid damage. A padded case or a dedicated shelf can be ideal. Consider the environment – extreme temperatures and humidity can affect the clay.

Crafting your own Pendant Ocarina is more than just a DIY project; it’s an artistic journey that culminates in a beautiful, personal musical instrument.
Each step in this process, from shaping the clay to tuning the final product, is a testament to your creativity and craftsmanship.
So, embrace this chance to create something truly special – your very own Pendant Ocarina! This journey not only leaves you with a unique musical instrument but also with a deeper appreciation for the art of ocarina making.
The joy and pride of playing an instrument that you’ve crafted with your own hands are unparalleled.
Your Pendant Ocarina will not only be a musical treasure but also a cherished keepsake that reflects your artistic journey.
As you play its melodious tunes, you’ll be reminded of the skill, patience, and creativity that you poured into every step of its creation.
Q: Can I use air-dry clay instead of high-fire clay for my Pendant Ocarina?
A: While air-dry clay is more accessible, it’s not recommended for ocarinas. High-fire clay provides better durability and sound quality, essential for a functional Pendant Ocarina.
Q: Is it necessary to have a kiln for firing the Pendant Ocarina, or are there alternatives?
A: A kiln is ideal for firing a Pendant Ocarina due to the high temperatures required. However, if you don’t have access to a kiln, you might consider local ceramic studios that offer firing services.
Q: How long does the whole process of making a Pendant Ocarina take?
A: The time can vary based on drying and firing times, but typically, creating a Pendant Ocarina from start to finish can take several weeks. This includes drying time, which is crucial for the integrity of the ocarina.
Q: What should I do if my Pendant Ocarina doesn’t produce the right sound after firing?
A: Tuning can be a challenge. If the sound isn’t right, you may need to carefully enlarge the sound holes. It’s a delicate process, so proceed with caution and make small adjustments.
Q: Are there any safety precautions I should take while making my Pendant Ocarina?
A: Yes, safety is important. Wear a dust mask when handling dry clay or sanding, and ensure proper ventilation, especially during glazing and painting. Always follow the safety guidelines of the materials and tools you’re using.