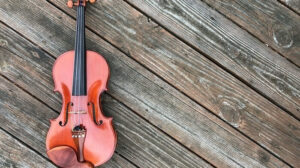
Exploring the Mystical Sounds: The World of the Ocarina
The ocarina is an ancient wind instrument known for its otherworldly and evocative sound. With a history spanning over 12,000 years across cultures worldwide, the

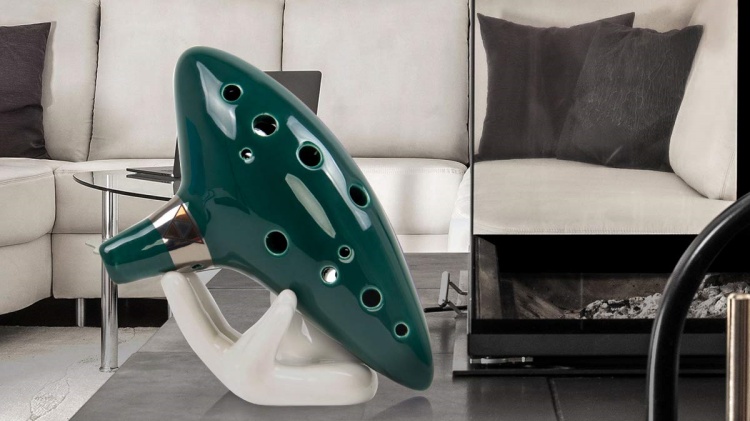
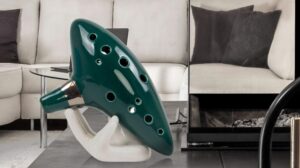
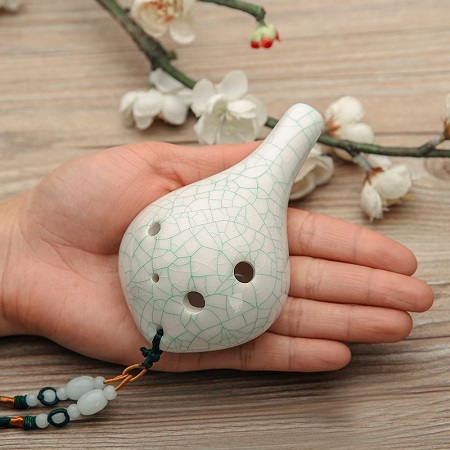
The world of music is filled with diverse and captivating instruments, and among them, the ceramic ocarina stands as a unique and charming creation.
With its hauntingly beautiful melodies and intricate craftsmanship, the ocarina is more than just a musical instrument; it’s a work of art.
However, like all delicate treasures, ocarinas can suffer from wear and tear. Cracks, chips, and scratches may appear over time, affecting both their sound and appearance.
But don’t fret! In this comprehensive guide, we will take you on a journey to understand, repair, and maintain your beloved ceramic ocarina, ensuring it continues to enchant you with its sweet tunes.
The ceramic ocarina is more than just a musical instrument; it’s a fragile creation that demands your utmost care.
Your ceramic ocarina can suffer from various types of damage, such as cracks, chips, or scratches. Each type affects the instrument’s performance differently.
Cracks can alter the sound, chips may affect the airflow, and scratches can be mostly aesthetic concerns but sometimes impact playability.
The intricate nature of a ceramic ocarina means that even small damages can have a significant impact.
Cracks, in particular, can cause changes in the ocarina’s tonal quality. Identifying these different types of damage is the first step in understanding how to address them effectively.
Ignoring even minor damage to your ceramic ocarina can lead to more significant issues. Prompt repairs are essential not only for preserving its beautiful sound but also for maintaining its unique appearance. Regular checks for any signs of wear or damage can prevent larger problems.

When you notice any damage, whether it’s a tiny chip or a hairline crack, it’s crucial to address it promptly. Not only does this help in maintaining the ocarina’s pristine appearance, but it also ensures that its sweet melodies remain unaltered. Remember, timely repairs can save you from more extensive and costly restoration efforts down the road.
Before diving into repairs, it’s essential to gather the right tools and prepare the damaged area for restoration.
To repair a ceramic ocarina, you will need specific tools like fine-grit sandpaper, ceramic glue, clamps for holding pieces together and possibly paint for color matching. Ensure you have a clean, well-lit workspace to conduct these delicate repairs.
Repairing a ceramic ocarina requires a delicate touch and the right set of tools. Here’s a list of essential items you’ll need for your repair journey:
Before any repair, cleaning the damaged area on your ceramic ocarina is crucial. Use a soft, damp cloth to remove any dust or debris. Ensure the area is dry before applying any adhesive or filler. This step ensures a stronger bond and cleaner repair.
Proper preparation of the damaged area is a critical step in the repair process. Here’s how to clean and prepare your ceramic ocarina for repair:
Preparing the damaged area ensures that the adhesive or filler adheres properly, resulting in a more successful repair. Cleanliness and attention to detail are key to achieving the best results.
Small damages, if not addressed, can lead to bigger problems. Learn to fix them with precision and care.

For minor cracks and scratches on your ceramic ocarina, carefully apply a thin layer of ceramic adhesive. Use a fine brush for precision and wipe away any excess. Allow ample drying time as per the adhesive’s instructions before testing the repair.
Repairing minor cracks and scratches requires attention to detail and patience. Here’s a step-by-step guide to help you mend these small damages:
Repairing minor damages is a delicate process that, when done correctly, can restore your ocarina’s beauty and functionality.
Sometimes the damage is more significant, but not all is lost. Here’s how to tackle larger breaks.
Techniques for fixing major breaks in ceramic Ocarinas
For larger breaks in your ceramic ocarina, carefully align the broken pieces and apply a strong ceramic adhesive. Use clamps to hold the pieces in place while drying. After the adhesive sets, check the alignment and functionality before any further use.
Repairing major breaks in a ceramic ocarina requires precision and patience. Here are the techniques to tackle these significant damages:
If the damage to your ceramic ocarina seems beyond your repair skills, it’s wise to seek professional help.
Complex breaks or damage that affects the sound quality significantly might require expert attention to restore the instrument properly.
It’s essential to recognize your limitations and prioritize the ocarina’s integrity. Seeking professional assistance when necessary ensures that your beloved instrument receives the care it deserves.
Repair is just the beginning. Proper care and regular maintenance are key to the longevity of your ocarina.
Tips for Post-Repair Care
After repairing your ceramic ocarina, handle it with extra care. Avoid exposing it to extreme temperatures or humidity, as these can cause the repaired areas to weaken. Regularly check the repaired spots to ensure they remain intact.
Once your ceramic ocarina is repaired, it’s crucial to provide it with the care it deserves to ensure its longevity. Here are some tips for post-repair care:
By following these tips, you can help your repaired ceramic ocarina maintain its beauty and functionality for years to come.
Regular maintenance of your ceramic ocarina is crucial. This includes gentle cleaning after each use, storing it in a safe place, and occasionally checking for any new signs of wear or damage. This proactive approach helps prevent future repairs.
Maintaining your ceramic ocarina goes beyond post-repair care. Regular maintenance is essential to ensure it continues to perform at its best. Here’s why it’s important:
By incorporating regular maintenance into your routine, you can extend the life of your ceramic ocarina and enjoy its enchanting tunes for years to come.
In the world of music, the ceramic ocarina holds a special place as a delicate and beautiful instrument.
While it may be susceptible to damage over time, with the right knowledge and care, you can ensure it continues to captivate you with its sweet melodies.
Repairing a broken ceramic ocarina is not just about restoring its functionality; it’s about reviving its soul.
With the right approach, tools, and care, you can ensure that your ocarina remains a treasured companion in your musical journey. Remember, a well-maintained ocarina is a happy ocarina!